You don't have to have an expensive camera to take good pictures.
You don't need a professional SLR type camera to take great shots. The key is to learn how to use the camera you already have. Dig out the manual if you still have it or Google your camera make and model to find the instructions. Most likely it will have a different setting for “close ups” which you should defiantly use for jewelry. It may also have an “exposure rating” which you can turn up or down to make your pictures brighter or darker, great if you don't have enough light or even have too much light. It should also have different settings for taking pictures inside or outside, an auto focus feature, and different levels of flash. If you play around with the settings you can drastically improve the quality of your photos.
Set the Stage
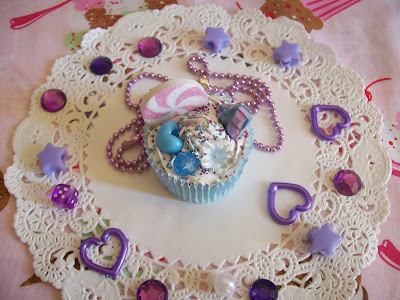
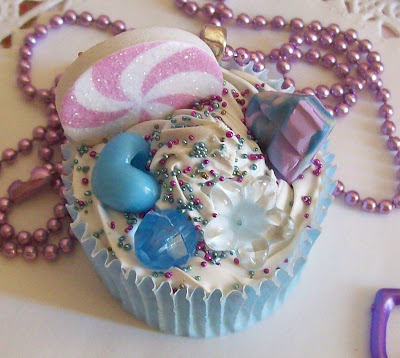
Instead of taking pictures of your items on a blank plane, try filling out the space around them. Use a colorful fabric or paper as a back drop. Include items from around your house or craft store such as books, a jewelry box, flowers, clocks, tea cups, lollipops, sprinkles, cupcakes, etc. It all depends on the item your selling. If you have an Alice in Wonderland themed necklace, use an old book, a tea cup or a watch. Just be careful not to over do it, you want your background items to add to the items you're selling and not distract from them. You don't want buyers to think you're selling antique books when you're really selling jewelry. Have a designated area in your house for taking pictures and use a back drop. if you could see to the left or right of my pictures you could see my messy PC desk littered with coke cans! Having your own space for pictures allows people to fill in the rest of the space with their imagination, to them the pictures could be taken in a fancy boutique shop. Setting the stage sets the tone of your entire store. Are you selling cute items? Or more grown up ones? Using different items in your pictures will communicate the style that your selling, and that's what people want to buy. After all, you wouldn't wear a pair of earrings and nothing else!

Experiment with Lighting
If you're taking pictures inside, you'll want as much lighting as you can. Find a space in your house that gets a lot of natural light and take pictures during the day with the shades open. Turn on a lot of lamps and bring them close to where you're taking pictures. Try not using a flash, personally I think the flash washes out a picture and makes items in the foregroundtoo bright and items in the background too dark. Taking pictures without a flash but with a lot of lighting creates a more natural look, as if the buyer was really there looking at the items in person. Try taking pictures outside at different times of day. You could use the natural setting of backyard trees and flowers if your items are nature inspired, or you could bring your backdrop and background items outside and set them up on a porch table.
Use a Thumbnail Picture
The first picture in your listing is the most important one. This picture is going to determine weather or not people will notice your item, click on it, discover your store and become a customer! Etsy will automatically size it down to make a thumbnail picture and this will be the picture used in your store, in Etsy searches, on your mini Etsy, and other places around the internet (Facebook, Twitter). You should take a close up picture of your item and use the “Crop” feature in a photo editor to cut out only the details of the item from the background. This way when Etsy sizes it down, you still get a good close up image that will be more eye catching. Otherwise your item could look so small and far away that people can't tell what your item is right away. Cropping a photo takes just a minute and it's worth the extra step in your listing process. If you still want to include the whole photo, save the copped thumbnail separately and list the original photo as your second image.
Before
Use All Five Picture Spaces
Etsy allows you to upload five images—use them! Take pictures of your items from different angles, take several detail shots, include pictures of the type of fastener for jewelry (is it a toggle or a claw?). Have a friend take a picture of you or take a picture of them wearing your item. Refrain from taking pictures of yourself though, having those pictures in every listing can make your Etsy look more like a myspace profile than a store run by a professional. Try some different settings or stages (one picture inside, one outside). Use the last image slot for a picture of how you package your items. Do you offer your items in gift boxes, tied with ribbon, a business card and a baggie of candy? Do you ship it in a box or a bubble mailer? People like to know exactly what they'll be getting, especially when you're shopping online and you won't see the item until it's been shipped to your door.

Try Some Photo Editing
Besides cropping for a thumbnail, you can use a photo editor to enhance your images. Use Photoshop if you have it, and if you don't you can find a free and legal software at GIMP.org. Also, most cameras now come with a basic photo editing program you can use. For example, sometimes my pictures come out so bright that it's hard to tell where the items ends and the background begins, so I use the “brightness/contrast” feature to make the item stand out more. I'm not suggesting that you use filters such as “Watercolor Painting”, you want your pictures to still look real and not over-edited. I've also seen many sellers use the “Glare” feature to make their pictures look really “blingy” Personally I don't like this, I can tell every time it's being used and it really detracts from the items.
Before

After

Only Use a Camera
That is to say, don't use a phone or another device that isn't an actual camera to take your pictures. Some phones now a days can feature really nice cameras, but they're not equipped to take those professional looking photos that you want. They don't have a focus feature which you will need for close up images. They're also not made to hold in your hand while you take a picture so you won't get a steady shot, they're made for holding up to your ear while you're on a phone call! And please, PLEASE don't resort to using the scanner on your printer to make an image! Borrow a camera if you have to.
If you have any more suggestions, please share them in the comments section. Good luck and have fun!